Anyone with a large collection of outdoor container plants or a garden gets tired of the responsibility of constant watering. The easiest way to eliminate this chore is by setting up an automatic drip irrigation system. Self Watering Planters DIY The parts are pretty cheap and the process proves to be not too intense. Not only do you save lots of time in the long run, but you can be more exacting in your watering.
DIY Automatic Watering System for Plants
Drip Irrigation Overview
So, what is drip irrigation? It is just a simple tubing system that slowly and efficiently waters your plants. There are several different types of drip systems. Some use external emitters and some use internal. Both internal, like Netafim and external like bug type emitters have a very predictable drip rate. Some will drip a half gallon every hour and others more or less than that depending on your needs. Drip rates are very important to the design as we shall see later. 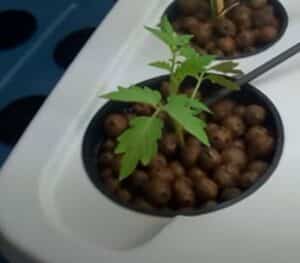
We must be able to make sure we are not over watering the plants and that we are not under watering them either. The fact is that drip irrigation allows us to have a very predictable rate of flow and is one of the reasons that makes it advantageous over typical home lawn sprinklers.
The other side of it, though, is that it is a relatively inexpensive system, most of the plastic parts that are part of this or range and costs range of cents, not dollars, and a bug type emitter can be about ten cents, other sizes, maybe around thirty cents. The tubing is usually a few cents a foot, so you can buy a hundred feet of tubing for just a few dollars. It is not an expensive irrigation type of system.
It is also very easy to assemble and that takes us into what one of the main benefits. The main benefit that you hear about is water efficiency. However, when you have an automatic sprinkler system or you are watering with a watering can or a hose, a lot of that water will just sit on the surface. It then evaporates or runs off and away from the root system of your plants. You are not getting the water right in the root zone where it needs to be. Low volume emitters, however, will just slowly drip and it keeps the ground moist.
When using drip there is not a lot of water waste. Water is not running off like with typical lawn irrigation heads. The water is not evaporating as quickly. The emitter puts out just a few drops every few seconds as it dribbles out so water efficiency and conservation is a big part of why to use drip.
If you depend on a metropolitan municipality for your water, it can be somewhat expensive to water a lot of plants. Drip irrigation can save much of that water. It is also cheaper from an ongoing maintenance aspect. From my personal experience of doing this, I did notice a difference in my water bill by having this drip irrigation on the entire summer versus using the water hose.
It is also very versatile. When I started, I had a container-based garden that was on my deck. I was able to run the tubing to reach one of my potted plants and have an emitter in each one.
It is very easy to install. In terms of being able to install this, all you really need are scissors and maybe a drip tube punch and a screwdriver for hose clamps. You do not need lot of expensive special tools. The various online drip irrigation stores, though, have plenty of specialized tools that they would like to sell you, but you really do not need them.
Basic Components for DIY Self Watering Planters
When we are thinking about designing one of these irrigation systems, we need to understand our water source. My initial water source was a normal hose bib outlet on the outside of my home. I needed to be able to understand where that is and how far away from it are my plants.
The way my drip irrigation system works, I had an existing in-ground automatic irrigation system for my lawn, and I tapped directly into that now for my water, so it is always on. I have a timer associated with it to handle the length of my cycles of water, but I am no longer connected to a hose bib. When I was using the hose bib I ran Sch 40 PVC as a mainline to feed the tubing. There are many types of attachments to connect the PVC to drip hose. 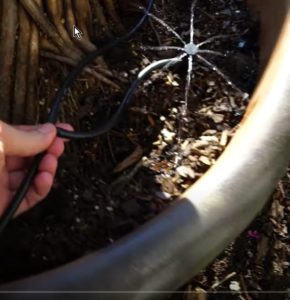
The other main component is a main assembly, and this is most complicated part of your entire irrigation system. We will break this down talk about the individual components. The tubing comes in a range of sizes and we will talk about how you decide what size is important and then, finally, you have several fittings to connect the tubes and tee intersections to get it to all the places that you need to. You also have the drip emitters and some other miscellaneous parts.
If using a hose bib as the water source, most of the kits you buy in the big box stores are already designed to fit a standard hose. You just literally screw it on. Unfortunately, though, your drip tubing is not a standard hose size, but you have other connectors that you basically use to bridge the different sizes.
I will be switching to a rain catchment system for watering my garden. I no longer want to use the public water source. I’m going to switch over to rainwater. This brings some challenges because it is not pressurized, and I must figure out how I am going to supply enough pressure to push the water through the dip hoses. I am thinking along the lines of a small submersible pump in a rain barrel. The timer would turn the pump on and off as scheduled.
Irrigation Timer
For automatic control all you need is a simple battery-operated timer. If you wanted, you could also use a 120v to 24v controller to power a solenoid valve. This allows you to program an automatic schedule for how long it will water and how many times a day. Most battery timers 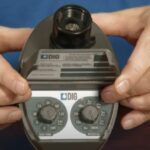
If your container garden is not covered by an overhang that blocks the rainwater, you may want to investigate using a “smart” controller. This type of timer connects to online weather data using your wi-fi network. The smart timer then evaluates the weather conditions and determines when to water the plants.
Without a timer you can just hook it up and just turn it on manually as you need water. However, a timer makes it much easier. Manually turning these types of systems on and off several times a day can be tedious.
Backflow Prevention
The next piece in the main assembly – and this is not an optional – is your backflow preventer. It is required by law in every Florida County. It prevents any of your drip system from flowing back into your home or public water system in case of a low-pressure backflow incident. It 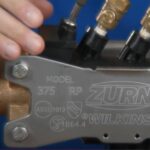
Filters
The next piece that you would typically see is a filter downstream of the backflow. There are a lot of different types of filters, but the reason a filter is important is because the outlets on your emitters are very small. It is easy get them clogged and plugged with grains of sand or any sort of debris even when using potable water. So, you really do require some sort of 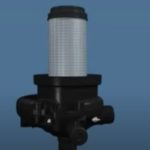
Pressure Regulators
The next major piece that you will need is a pressure regulator. This is another type of valve that has a spring inside of it. Most drip irrigation work most effectively between 15 pounds per square inch 25 pounds per square inch. Usually, your home pressure is way higher than that in Central Florida, so we are lowering the pressure to the drip system.
This is also why a typical rain catchment system not being pressurized will have some problems being able to push the water to 25 pounds of pressure unless you have like a little makeshift water tower or pump. In addition to a standalone pressure regulator, some emitters also have regulation built in. However, you still want to pressure regulate your mainline as you do not want the tubing to burst from too high of pressure.
Fertilizer Injector
An optional piece of equipment is a fertilizer injector. They are quite pricey, and they range from about two hundred to four hundred 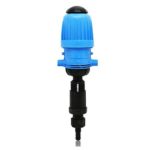
By using one your plants are not just getting watered, but every single watering is giving them a minute amount of fertilizer. If you use too much fertilizer you could chemically burn your plants and kill them so carefully read the label on your injector.
Drip Tubing
Your next major component is the drip tubing. It is available in poly or as vinyl. There really is not any difference between the two in terms of performance differences, only the thickness of the wall. The vinyl is a little bit thicker than the poly. The poly tends to be a little stiffer, so it is a little harder to maneuver around your garden. 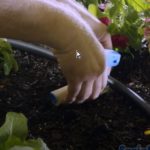
You will need a main line to deliver your water to the various tubes. Essentially, you need a larger pipe that goes into a bunch of smaller tubes. Your mainline pipe is either going to be a half-inch, a minimum or up to a full inch. Typically, small tubes will go to the individual plants if you are doing a bed, however, usually you would still use a mainline in a very long line and have them tee off all the way.
Drip Fittings
There is a lot of different fittings and types of drip tubing. The different kinds are spiral barbed fittings and perma lock or compression fittings. With spiral barbed fittings would push your tubing onto the end of it and push and twist until it provides a seal. If this is tight it will not leak. 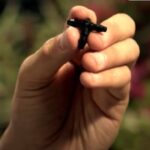
The other type is compression. Compression fittings are a little bit cheaper but the compression fitting is a once use and, like any plastic, even though this has a UV protectant in it, it will eventually wear out in the sunlight and will need to replace this. To me, the difference in cost for a compression fitting is not worth it because you end up having to replace all your fittings as well as the tubing.
Emitters
There are a few different types of emitters. There are inline such as Netafim and external emitters like individual bug emitters. There are 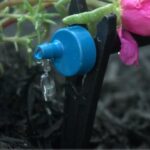
prefer to have the water fall on top of them, and others do not like being touched by water such as roses. As an example, lettuce is ok with being wet, tomatoes are not as it spreads fungus.
In general, the water from drip goes directly to the roots whereas the micro sprayers are throwing water up into the air, and there is more waste due to wind and evaporation. They also require a lot more water and more pressure to run as well. 
The pressure for the drip emitters come in a couple different types. I prefer what is called a pressure compensating emitter. The idea behind the pressure compensating dripper is that the pressure in your tubing will vary as it goes up and down in elevation over your terrain. So, if you have dips in your terrain, the pressure is going to be heavier, as you go higher up the pressure will be less. We want to consistently drip at the same rate, regardless of varying elevations or friction loss.
Drip System Design
We need to work out how much water we are going to need for our plants and because of that we must do some calculations, but it is all very basic stuff. What do we need to know? We need to understand our water source. We need to know the distance from the water source to the irrigated plants. Then we then need to know how much water our plants need.
Water Requirements
This is where it gets a little complicated because we have to deal with things like; What if it is raining? What is the evapo-transpiration rate and how much water do our plants require? How many plants are we irrigating?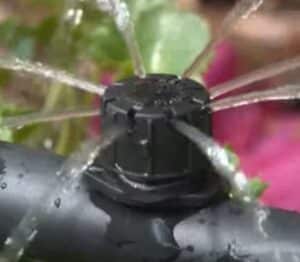
Each emitter uses some of the water in the tubing. All drip tubing has a maximum water flow capacity. So, we need to know how many emitters our tubing can supply.
If I have a small micro tubing, I can at maximumly supply 30 gallons per hour of water down that tube. If I have one gallon per hour emitters attached to that tube, I can only supply 30 of them before running out of capacity.
If you have a standard garden, the calculations are not so bad as we can do it just based on the kind of the square footage of the garden. But in my case, where I had all these pots that I was trying to supply water to, each one of them has a different soil and root volume and requires a different amount of water.
Typically, vegetables need one to two inches per week and that does vary by plant-type. Some plants are more water hungry than others. Some are also less tolerant of over-watering than others. I suggest you spend a little time researching your individual plants water needs. An obvious example would be the amount of water roses need versus a cactus.
We must understand what our flow rate is through one of these tubes. We also then need to understand that when we are talking about inches of water, every one of these drip components is measured in gallons per hour.
So how do you calculate from gallons per hour to two inches of rainfall? I guess the important part is to understand that when we are talking about inches of rainfall, you are essentially talking about cubic inches.
When we are talking about a cubic inch, we are talking about how that is spread out over the ground. If we can calculate the volume of soil, we can figure out how many cubic inches we need to be able to cover that area with water. Essentially, one gallon of water equals two hundred and thirty one cubic inches.
Calculating Water Requirement
Let us say we have a one cubic foot root ball, which is rather small by the way, but we will just use this to keep the math simple, and it requires two inches of water a week using a half gallon emitter. How long do I need to be to run this every day in order to get the two inches of water a week?
- One cubic foot equals 144 cubic inches
- Two inches of water = 288 cubic inches in a week
- 288 / 231 = 1.25 gallons per week plant requirement
- 25 weekly required gallons / .5 gallon per hour emitter = 150 total minutes
- 150 minutes / 7 days = 21.25 minutes run time every day to supply the one cubic foot root ball with 2 inches of water per week
Of course, if you use a one gallon per hour emitter you can lower than run time to 75 minutes and so on. You need to factor in rainfall if your garden is not covered. If it rains two inches and then you also irrigate two inches you have overwatered your plants. As I explained earlier a smart controller can help with that as it will take the rainfall into consideration.
If we are talking about that average type of garden or even a raised bed, we do not need to have exact per plant calculations. We can average it out for the entire bed. What is the volume of the soil that is in my in my plant’s bed or garden times the amount of water needed?
Here is a helpful chart to determine garden watering needs https://wateruseitwisely.com/100-ways-to-conserve/landscape-watering-guide/plant/
Pipe Sizing
As stated earlier, drip tube gallon per hour capacity is about 30 gallons. You also start to experience fatal pressure loss after runs of more than 30 feet. My suggestion is to use more PVC mainline connections if possible. For example, ¾ inch Sch 40 PVC main can supply seven gallons per minute while keeping under the recommended velocity of 5 feet per second. This equals 420 gallons per hour which should be plenty even for ambitious gardeners. By using more mainline and fewer long runs of drip tubing you can maximize your water source.
Soil
If you have raised beds or container plants using commercial potting soil you generally do not need to be concerned with runoff or vertical leeching. Potting soil is very effective at holding water. However, if your garden is in the ground and you have clay or sandy soil (we have both in Florida) things are different.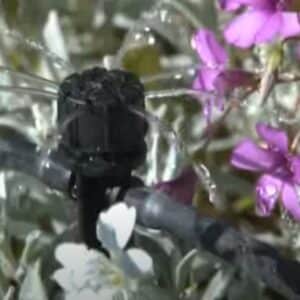
Clay soil has very poor percolation and even with drip it is possible to experience some run off. If you do, apply the same amount of water but in shorter durations. This will limit runoff. This also works for sandy soil where the water percolates to fast to stay in the root zone.
With sandy soil however the process is different. Water is cohesive and clings to itself. If you put down one application, the existing water in the root zone will cling to the water percolating through the soil from the second application. And then you apply some more water. This is known as syringe cycling “cycle and soak.” https://www.ccwater.com/DocumentCenter/View/295/Irrigation-PDF?bidId=
Conclusion
Setting up an automatic drip irrigation system for your home landscape beds or container garden is not terribly difficult. It is good for your plants as well as the environment and your wallet.